Magazines, sales advertisements, product photos, and all of those other fabulous things out there that you know one thing for: Beautiful photos of singular things on an un-obstructive background. Samples gathered from online below:


I've been beating my head trying to find a good way to render 3D images this way without having to spend countless hours playing with compositing nodes or rendering-out environments by disabling their rays from the camera, or rendering transparently and then photoshopping in some other background or solid color.
How, but HOW could I render all of my pretty reflections and get that perfect solid color background too!?
I began to journey down the rabbit hole, and how most have surely encountered the most common way to do this is to set your HDRI image in as your Environment Image and uncheck the "Camera" ray visibility option. This renders your reflections from the environment and gives you the environment lighting, but renders a simple BLACK background.
I searched everywhere... I figured that there would just be a simple setting SOMEWHERE to change the color of the camera's rendered background color. Obviously simple, right? Right? ...nope.
So, while working on my Smial project I developed (stumbled) across a process that actually WORKS. It is rather simple, too. Check out the tutorial below:
The Process (Environments / Worlds)
|
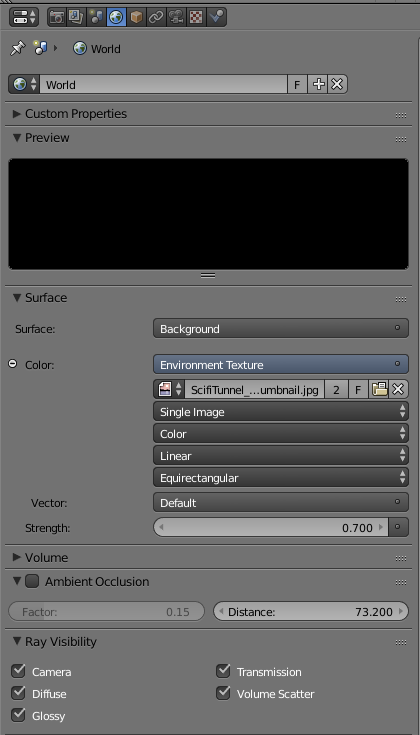
To begin, the first world I created was using a standard HDRI image and an Environment texture image. This provided me with unique lighting and a good set of reflections to properly gauge and change materials and modeling where I saw fit. HOWEVER, the renderings were horrendous because the Environment texture just looked blurry and out of place in the test phases of modeling and just did not fit.
The settings in the photo to the right would produce an image that looked like the following: 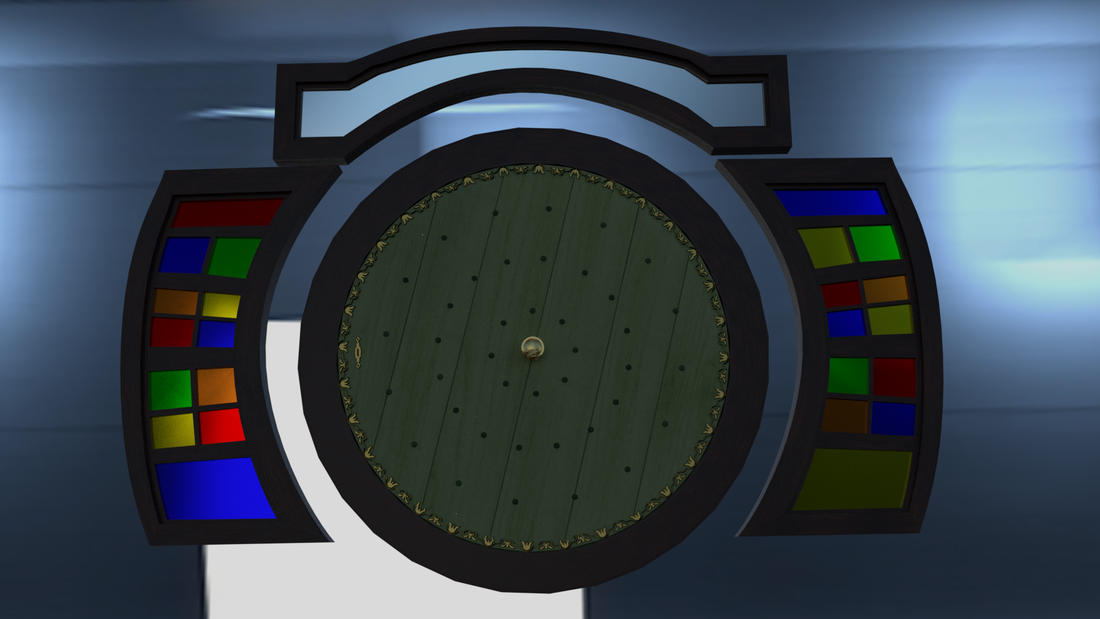
However, if you are cunning enough and can properly use the Google machine, you can quickly find out to get rid of the nasty background is as easy as unchecking the "Camera" box in Ray Visibility options.
|
|
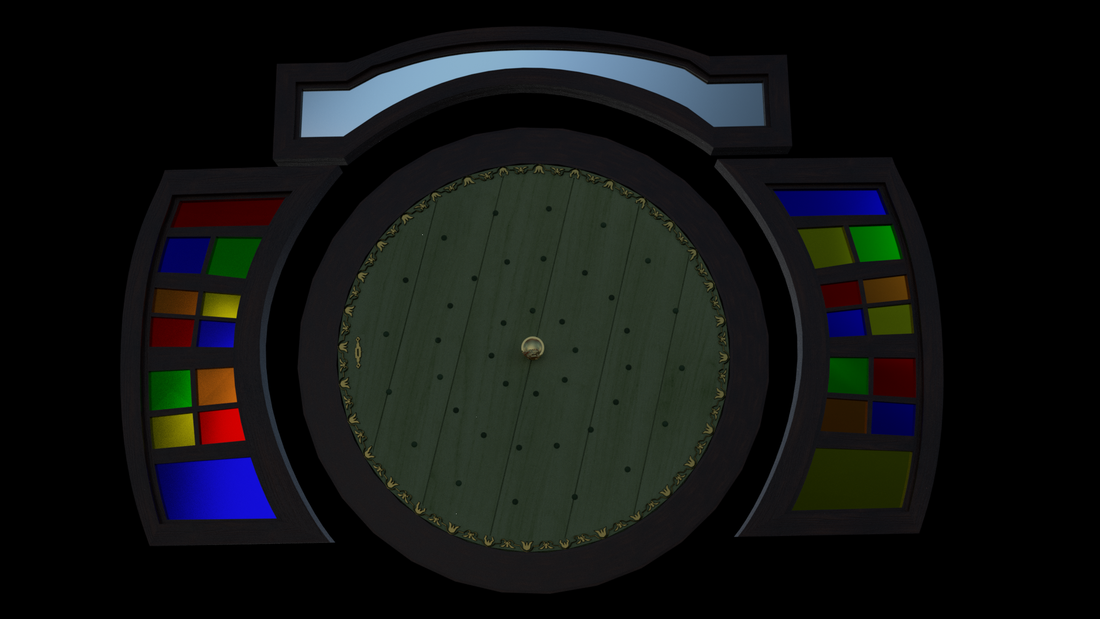
If you are lucky enough, this will render your model using the correct Environment lighting and reflections, and get rid of that blurry mess of colors behind your model so you can get a good view of all of your edges and truly see your hard work.
|
Well, wait a minute. This is not exactly what I want. Sure, we got rid of the funky background, but now the background is black and it makes it unusually difficult to see all of the work - especially when dealing with darker textures and materials!
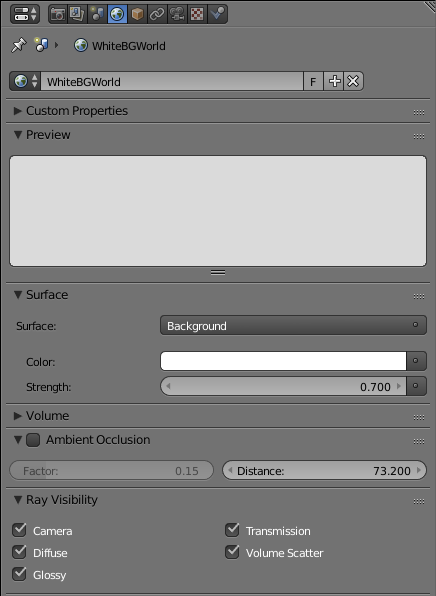
I can see my model, but this just will not suffice while I'm working on the project. I need to brighten up what's behind so I can see everything better. So, let's brighten-up the world and just dump the Environment Texture image. Instead, we can just crank up the saturation on the old default grey background and even go white. If you copy the settings on the right, you'll end up with something like this: 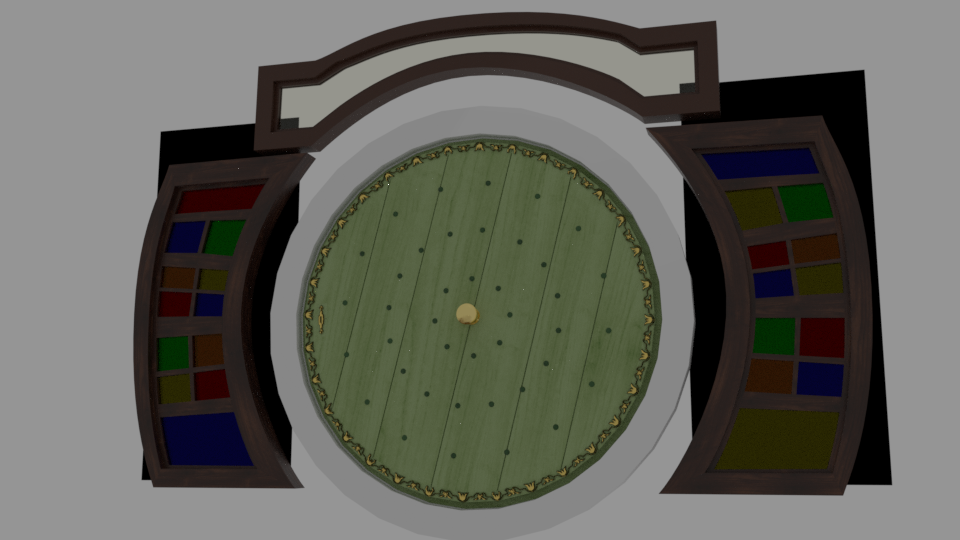
|
|
Okay, that's just drab. Sure, now I can see the outlines and edges, but the color is poor and there is no reflection. I could add more lighting and add a bunch of background elements to reflect, but that just makes more work for later when tweaking the scene and making final adjustments for rendering. There needs to be an easier way!
Now comes the fun part -- innovation.
So, the Environment / World tab let us add our Environment Texture. It also let us crank up the color in the scene. Why can't there be a node that does both? Well, good news: there sorta is! ENTER: The Mix Shader.
The short GIF animation below shows in detail how to configure this shader node, or you can continue below to read how it was done.
|
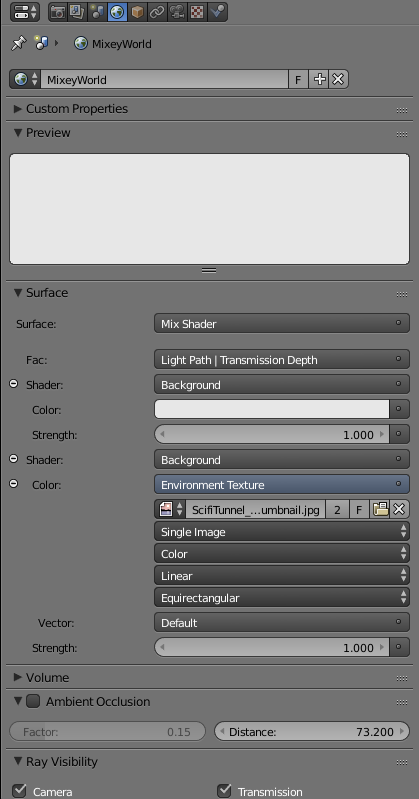
So, select the Mix shader in your Surface field in your Environment tab. You can then change both shaders to Background elements. Set one as your background color that you wish to put your object on, and the other to an Environment Texture image that you want to use for your reflections and lighting.
After you have selected these two items you then want to change your 'Fac' to either Transmission or Camera depending on how your have the two Backgrounds configured. Try switching between the two to see the different effect on the image. If using the setup like on the right, your image should resemble the following: 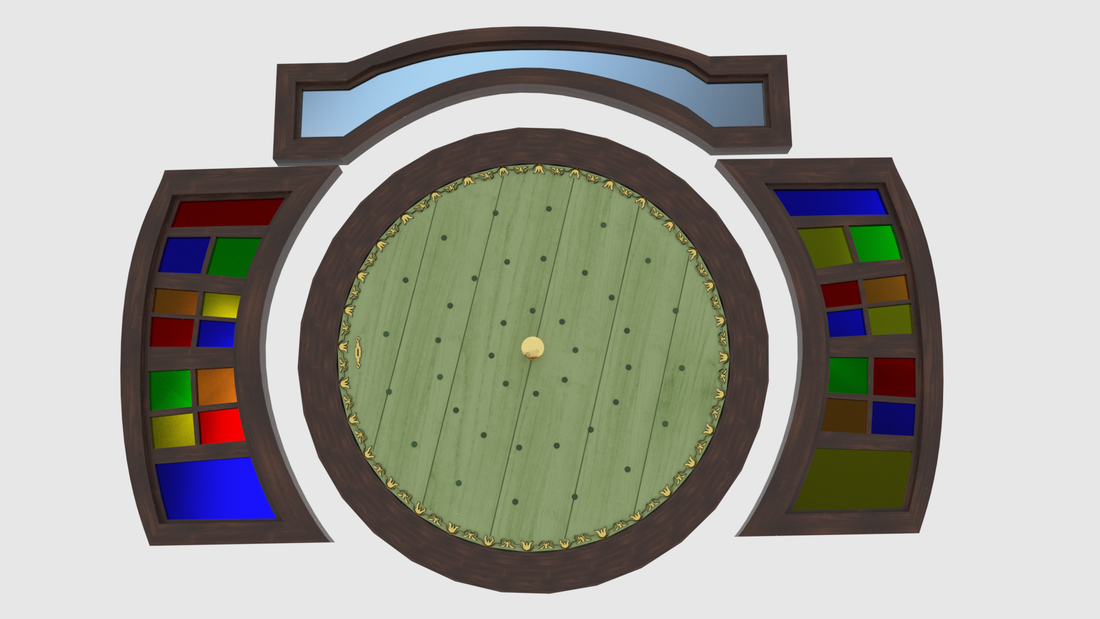
While this isn't a pure white background, it suffices for what I am trying to accomplish. I am sure it wouldn't take much tweaking to polish out the color. I hope you find this small tutorial of some use - I know stumbling upon this helped me a whole lot!
|
|
Mission accomplished. Carry on, Captain.
