If you're anything like me the primary reason you ever dived into programming was for the opportunity to one day develop a game. Games are a diverse genepool of programming strategies and algorithms layered on top with stunning visual masterpieces that captivate their users by their depth and gameplay features.
However, you're not going to be able to immerse yourself very well if there are other things distracting you in your view, and you can see other elements of your computer screen while you are playing. Just like all other major titles and big-league games, to be any competition at all you need to be able to control the screen, and this means taking it over completely.
This tutorial assumes that you are developing in C#, and in this case, using WPF as it is feature rich and the easiest way to get started. It will teach you how to manipulate your program to take over the Windows screen, and a few different ways to implement the feature.
Create your program.
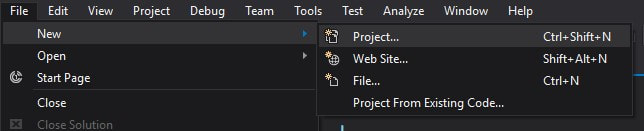
After opening Visual Studio, let's create a new Project. The easiest way to do this is by using your mouse on the File menu and navigating as such: File -> New -> Project... (this is demonstrated in the screenshot below.)
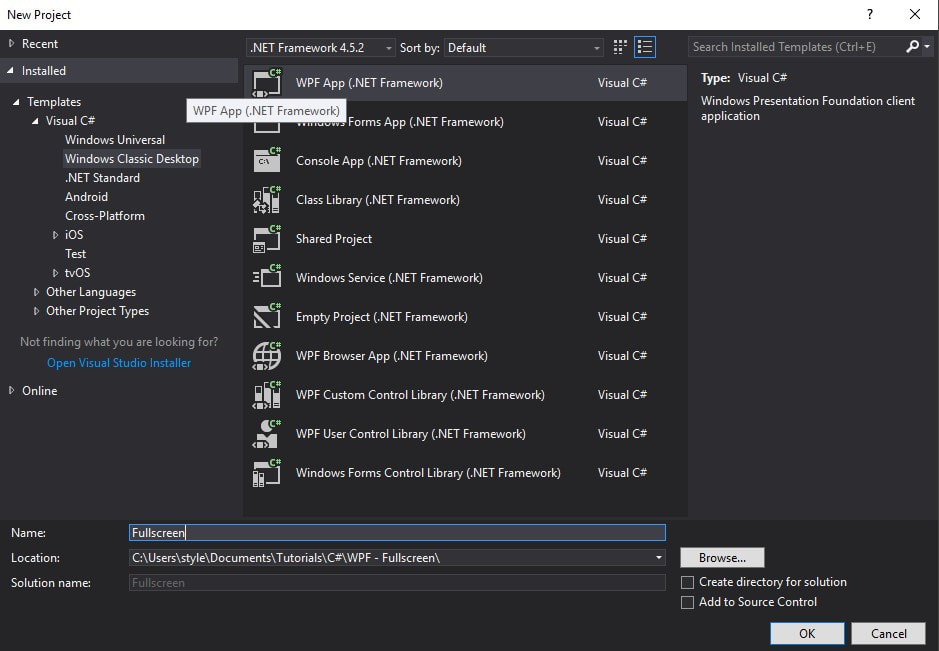
The New Project dialog will appear. For the purpose of this tutorial, we want to select WPF App (.NET Framework), make sure you select a directory that you want to save it in. For this tutorial, we've named our project Fullscreen. You can select the checkbox for Create directory for solution if you would like Visual Studio to automatically make a subdirectory in your selected directory to store the program's solution in.
Click 'OK' once ready. Sit back and watch Visual Studio go to work creating your program.
Click 'OK' once ready. Sit back and watch Visual Studio go to work creating your program.
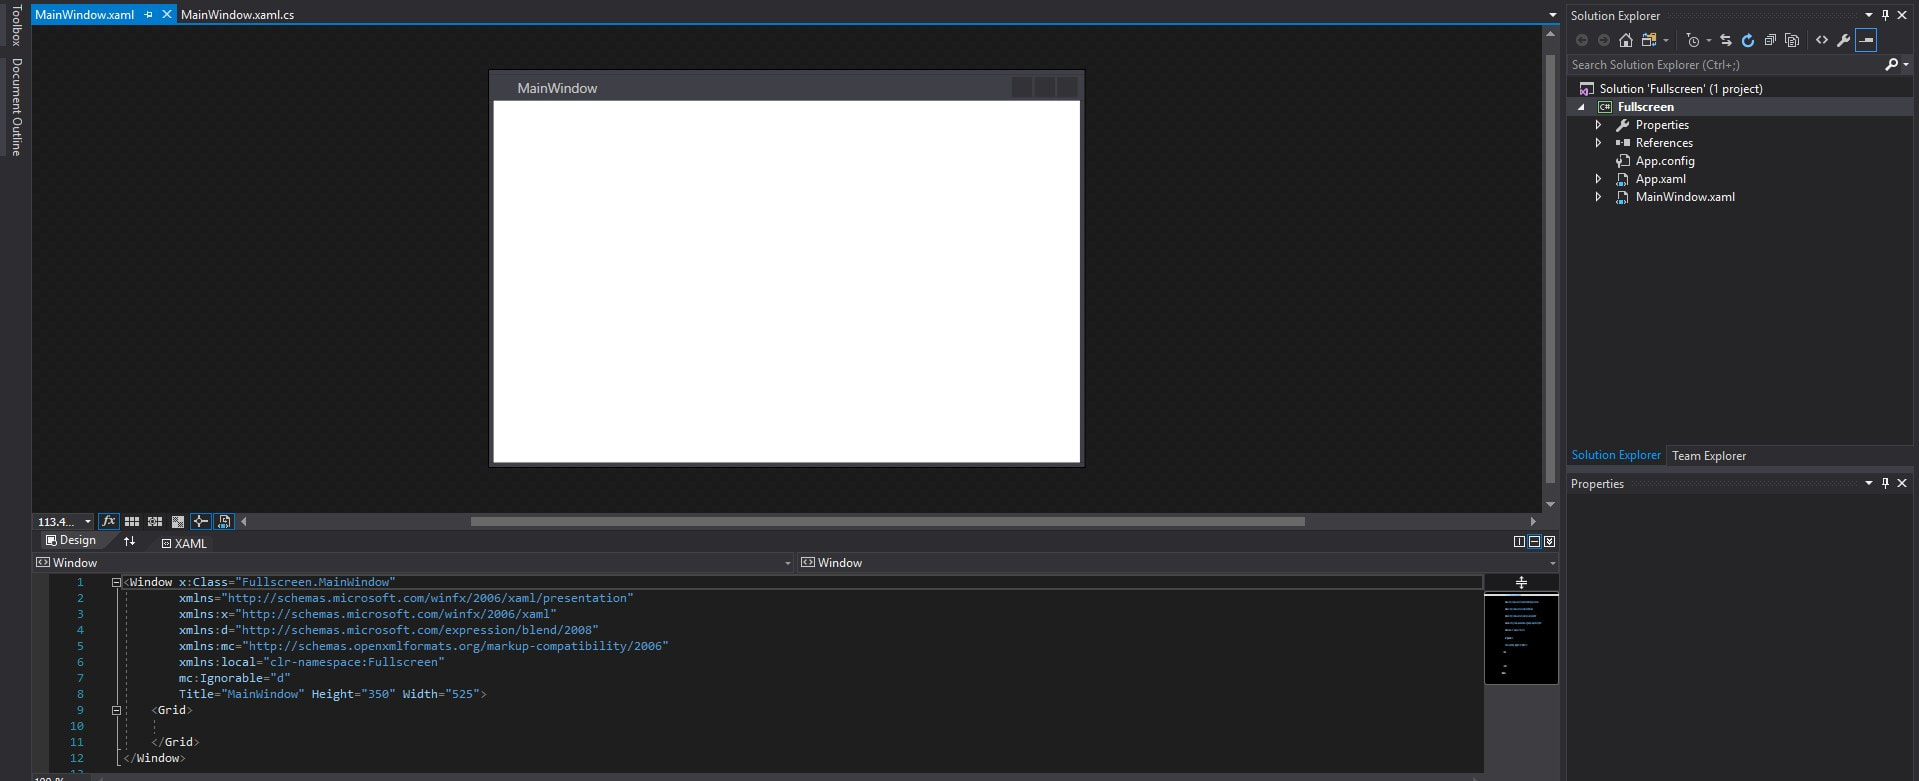
Once Visual Studio has finished building the framework for your application, you should end up with a screen that looks similar to the screenshot below. If you liked, you could run this application already to see what it can do. Congratulations, you've already begun your first C# program, and it already works!
Continue on to begin programming.
Continue on to begin programming.
Adding the Full Screen code.
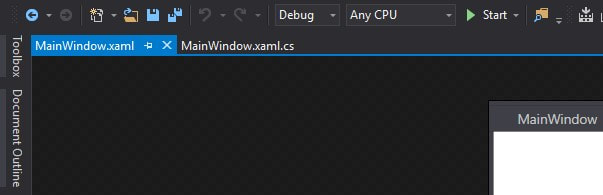
At the top of your Design View in the main Visual Studio window with your brand new project open, you should see two tabs at the top. By default, these are named: MainWindow.xaml, and MainWindow.xaml.cs. The first tab (MainWindow.xaml) holds the XAML code which designs the physical appearance of your Windows program in WPF. It allows an easy and visual way to lay out your designs for your program or game. The second tab (MainWindow.xaml.cs) is the supporting class file for your XAML document - it houses the C# code that supports all of the functions and methods that operate everything for your XAML window.
Click the tab for MainWindow.xaml.cs to continue and start adding your code for this program.
Click the tab for MainWindow.xaml.cs to continue and start adding your code for this program.
Once you switch tabs, you should see the basic C# code that Visual Studio has already inserted to support your program. The area that supports the main code reads: public partial class MainWindow : Window. This provides the name for your class, MainWindow, and ties it to the Window object type so it gives access to certain functions that only apply to Window objects.
Here is the main body code that Visual Studio provides:
Here is the main body code that Visual Studio provides:
|
namespace Fullscreen
{ public partial class MainWindow : Window { public MainWindow() { InitializeComponent(); } } } |
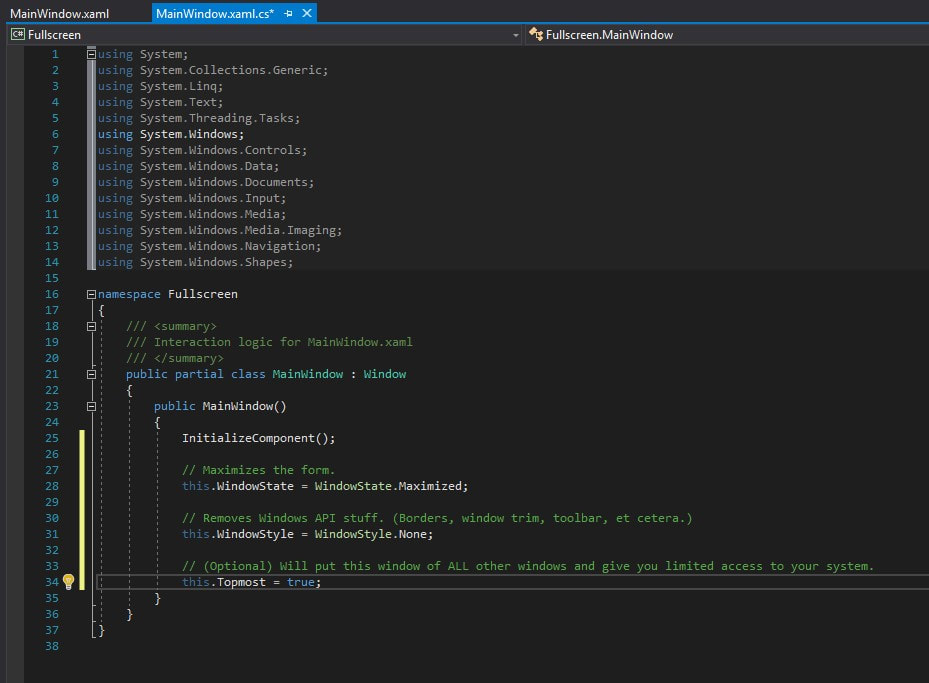
We want to insert the following lines below InitializeComponent()
|
this.WindowState = WindowState.Maximized;
this.WindowStyle = WindowStyle.None; this.Topmost = true; |
Your code should now look somewhat like you see in the screenshot below:
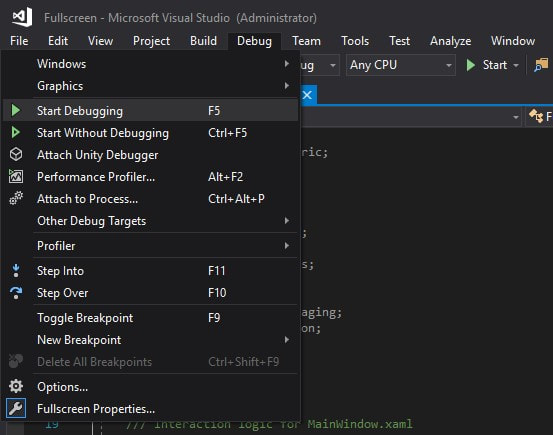
We can now Run our program to see what it does. In order to do so, you may navigate to Debug -> Start Debugging, press Start on the toolbar, or press F5. (Methods to start your program are seen below.)
Great! Our program opens and goes fullscreen! That was easy. But, wait, it seems rather difficult to get out of it. That is because of the line:
|
this.Topmost = true;
|
You can remove this line or comment it out and run your program again. Much easier to get out by hitting the Windows key or Alt + Tab'ing out now. Let's move on and find a way to maximize the use of this code for future implementation.
goFullscreen() Method
Under your closing curly bracket for MainWindow(), let's insert the following code:
|
public MainWindow()
{ InitializeComponent(); this.WindowState = WindowState.Maximized; this.WindowStyle = WindowStyle.None; this.Topmost = true; } |
|
public void goFullscreen()
{ } |
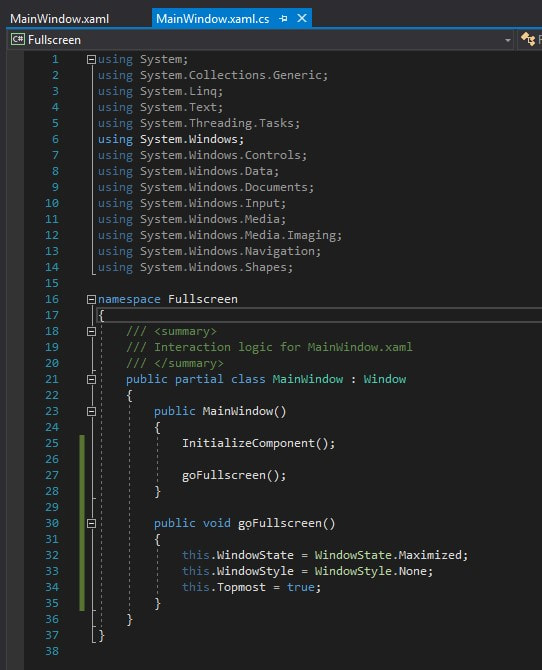
What we need to do next, is copy your code that you put into MainWindow() in the previous section of this tutorial, and paste it into the goFullscreen() method. Your code should now look like this:
|
public MainWindow()
{ InitializeComponent(); } public void goFullscreen() { this.WindowState = WindowState.Maximized; this.WindowStyle = WindowStyle.None; this.Topmost = true; } |
To make this code work you need to then call the goFullscreen() method from your main program in MainWindow() by adding this line to the MainWindow() method:
|
goFullscreen();
|
After making this edit, your code should now look like the screenshot below. If it does, go ahead and run your code. (Press 'F5')
Alright. So, same result as before, right? Right. The big difference now, we can go to full screen mode whenever you want to in your game with a simple method call. This would be great if you made a game that was allowed to run in Windowed Mode, but you had cutscenes that you wanted to allow to play in full screen between levels, or perhaps you want to allow the player to switch in and out of full screen. Oh? No worries, we'll look into that next!
Switching in and out of Fullscreen Mode
Do your finger exercises and get ready for some real heavy-lifting because this is where some real coding begins. Now we'll extend our full screen code and our new method call and allow our end-user to decide how they want to play.
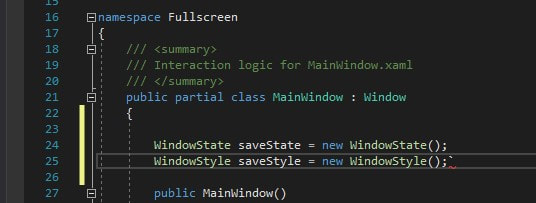
Let's begin by adding two important variables after the class call:
Let's begin by adding two important variables after the class call:
|
WindowState saveState = new WidowState();
WindowStyle saveStyle = new WindowStyle(); |
Your code should start looking like the below screenshot.
These variable instantiations are fairly simple and straightforward:
|
WindowState saveState = new WindowState();
|
|
|
WindowStyle saveStyle = new WindowStyle();
|
|
So, easily put, we have created two values saveState and saveStyle to store some Windows information into.
Now, we are going to add some code to quickly generate some objects in our Windows' Form so we can allow the user to interact. Remove your call to goFullscreen(); and add the following code below InitializeComponent():
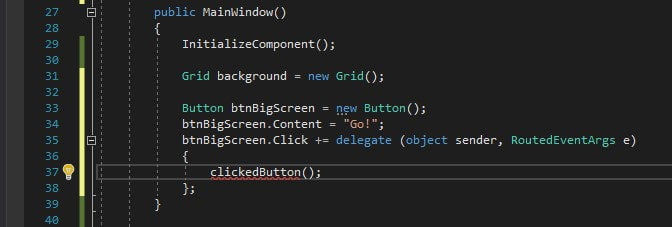
What we have done is created a Grid object, which is an object that allows us to organize and store other elements and display them in our Window. We then create a Button object to add to this Grid with the text "Go!". We then give the button a function when clicked that calls the method clickedButton() which we will create next.
Below your closing curly bracket for public MainWindow() add the following code:
Below your closing curly bracket for public MainWindow() add the following code:
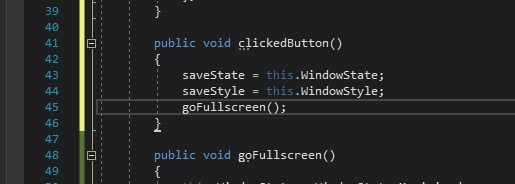
This code create a new method for us, clickedButton(). This method stores the current WindowState and WindowStyle of our program's window into our previously-created variable objects saveState and saveStyle. After storing this information it then calls our goFullscreen() method that was created in the second part of this tutorial.
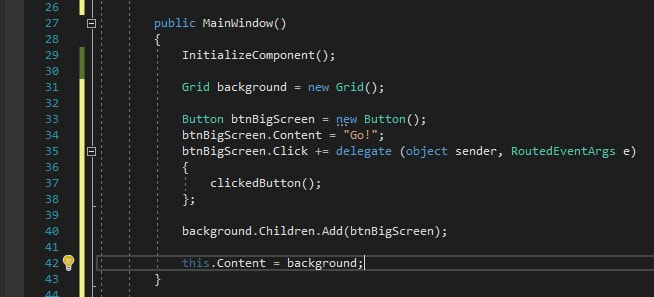
We need to make sure the Grid and the Button previously created get added to our program. Let's go back and add to the bottom of the MainWindow() method the following code:
We need to make sure the Grid and the Button previously created get added to our program. Let's go back and add to the bottom of the MainWindow() method the following code:
|
background.Children.Add(btnBigScreen);
this.Content = background; |
This code places the button control into the Grid (remember, I said the Grid was needed to put elements into a Window, so this is necessary) and then we assign the Grid (named background) into the Window by assigning this (this Window!) the Content of background. Your code should resemble the following:
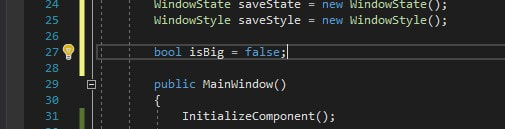
The main idea has been established in the code so far. However, we still need to be able to switch back. To begin we can add a quick boolean variable to the class. Add bool isBig = false; in the code right above the MainWindow() method, right below our earlier variable objects (saveState, and saveStyle).
Finally, we need to add a logic statement to our button's Click EventHandler. Change your code in the clickedButton() method to reflect the following:

This code utilizes our newly established boolean variable isBig to test whether the WindowState has already been changed. If it has not, it allows the button to change the Window to full screen mode. If it has changed, it allows the button to revert the changes. Press F5 and try your new program now.
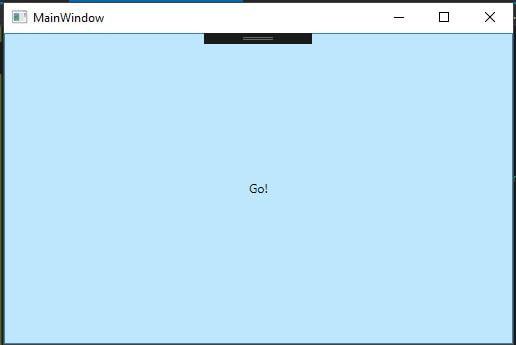
Starting State of Window, MainWindow
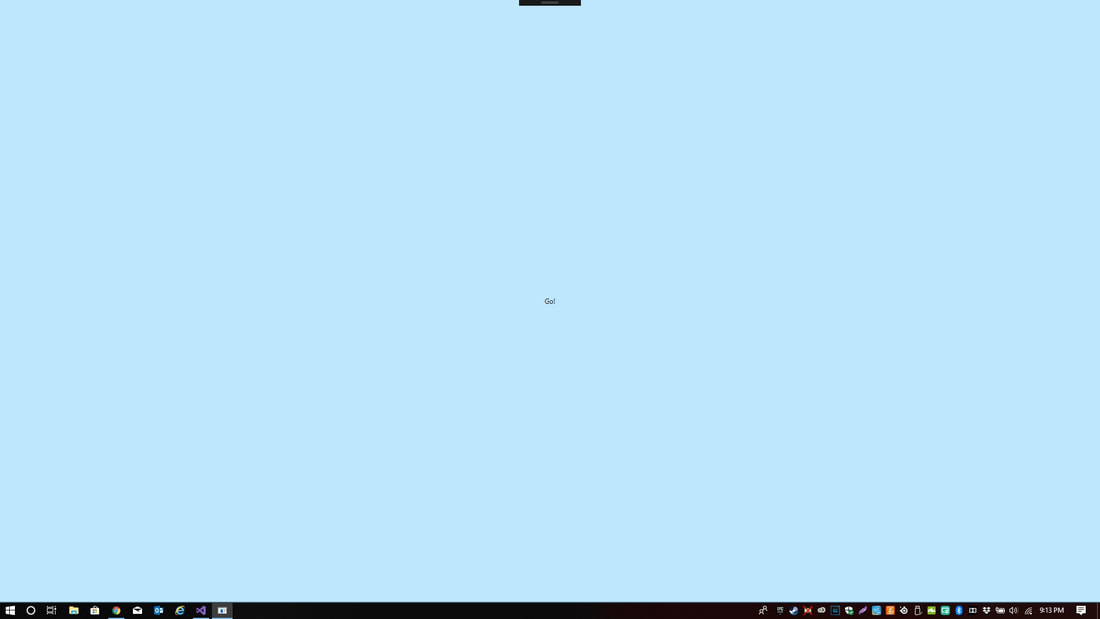
Window going full screen. If clicked, will revert to the original size.
There you go! Whenever you click the body of the Window it will either shrink or expand from/to full screen mode. I had a lot of fun creating this tutorial, and I hope that it helps any of you new or experienced C# programmers in your endeavors. Thank you so much for reading!
Click below to get the full solution file for the program.
| c-sharp_fullscreen.zip |
